Showing posts with label Mod Podge. Show all posts

Friday, August 29, 2014

a-Pair-a-Day: Swim, Swim

Inspiration: Swim, Swim.

Several years ago, while futzing around with some art, I jotted down the phrase, "Swim, swim little fish." It's stuck with me, and I think of it whenever I feel frustrated or challenged by life stress. The paper used as part of today's design features a close-up of decorative goldfish scales, and reminds me to keep going (despite the stress I'm feeling in regard to my shop opening in two days).

These earrings feature decorative paper with a goldfish design that has been cut and adhered to copper plates via glossy Mod Podge. The plates hang in front of repurposed white shell earrings that have a metallic rim. Silver-plated stainless steel jump rings hold the two pieces together. The ear wires are silver-plated stainless steel. This pair measures approximately 2.5 inches in length.


Tuesday, August 19, 2014

a-Pair-a-Day: Collage

Inspiration: Collage.

My wonder twin, Sarah, and I went out to lunch today at a lovely cafe/farm/gift shop. While eating a very tasty sandwich, I had a perfect view of a jewelry display. Because I wasn't wearing my glasses, I thought the jewelry used antique coins or buttons. Upon closer examination, the jewelry did not feature coins or buttons, but it did inspire me. I thought, "Why not try punching a hole through a penny?" For today's pair, I did just that. I also whipped out the paint and Mod Podge again, imbuing the pair with a collage-y kind of feel.

These earrings feature copper pennies that have had a hole punched through them. The pennies were painted with white acrylic paint that was then partially scrapped off. A glossy glaze seals the paint. The findings and ear wires are stainless steel. This pair measures approximately 1.5 inches in length.


Tuesday, April 2, 2013

Hot Ticket Tuesdays Presents MAGGIE.

Maggie: She's what defines Hot Ticket. To fully describe why Maggie is so amazing, I need to provide you with a bit of background:

After a turbulent sophomore year of high school, I decided that I wanted to leave home and go to boarding school. I went from a 500-person school in the small central Massachusetts town I grew up in to a 1,000-person school in the western part of the state. I was fairly shell-shocked and unprepared when I arrived at NMH (Northfield Mount Hermon). Every morning for the first two weeks, I woke up and vomited due to anxiety and homesickness. I cried a lot. I was a mess. I missed my second day of classes because of the vomiting issue. Later that day, a note was delivered to me. The note, written in light blue gel pen on recycled loose leaf paper, was from Maggie, one of my classmates. Maggie wrote how she noticed that I wasn't in class that day, and she welcomed me to hang out with her. It was one of the nicest gestures I have ever experienced.

I decided to brave leaving my dorm room, I and went to visit with Maggie. One of the first things I noticed about her half of her room was that it was impeccably decorated. Her posters were in frames. She had a stereo system, and a beautiful wrought iron lamp that she told me her father made. I learned that her dad was a blacksmith, her mother was an artist, and that Maggie dreamed of performing in musical theater. She talked to me about her favorite performer at the time, Ruthie Henshall, and how her father had taken her to see one of Ruthie's shows. Maggie seemed confident and vibrant. Over the next two years, we became best friends, and we've managed to keep in touch since.

Maggie currently lives in Portland, Oregon, and she works as a collections information manager at the Portland Museum of Art. (I looked up her title and everything!) She continues to have impeccable taste and a love for musical theater. She continues to make me laugh and smile whenever I hear from her. When I asked Maggie to be this week's Hot Ticket, she wrote back and told me that she isn't into the crafts, per se. She suggested that she write about her love of design and how her home reflects her creative choices. I loved this idea, naturally, and encouraged her to run with it. Below, Maggie talks about making her apartment into her home.

Tell me about a craft and/or art project you made. 
I was so excited and flattered when you asked me to do this, but it was a harsh reminder that I haven't been making things as often as I used to. I truly believe that art is everywhere, though, and that, surely, I could find something from my life to talk about even if I don't have any big or inspiring projects to share. I thought about a few small home improvement things that I've done over the past few years and then I thought about talking about my flea market and thrift store treasures and then I thought about having a snack and then it hit me: every topic I entertained was about my HOME. Really, my favorite project to work on is making my home a comfortable and welcoming place. So that's what I'll talk about.

What inspired you to make it?
"I have always been a woman who arranges thiiiiings . . ." My parents always made a beautiful home for us and when I left at 14 to go to boarding school, it was very important to me to maintain a sense of homey-ness from afar. Since I left for boarding school, I've had a different room of my own every year of my life, with very few exceptions. If the location isn't stable, at least the feeling can be, you know? That, and it's compulsive.

Did you come up with the idea yourself, or did you find a pattern and/or template that you used?
I follow design blogs (like this one) and I have a boatload of ultra-creative friends, including my supremely artistic parents, who inspire me all the time. Some project ideas I borrow, some are born of necessity, some are the result of sheer boredom, and some are challenges.

Here's an example of a sheer boredom style project. I had a can of stain and some paint samples and a really drab IKEA bookcase. It was inevitable:


I got this A/V cart at a local thrift store for $15 and gave a fresh coat of spray paint in the parking lot next to my apartment . . . LIKE A BOSS:


The reason I got the A/V cart was to give my projector a home. Once the projector had a proper home, I had to re-paint the apartment to upgrade the viewing experience. I chose a dark color to give the screen contrast and did a little research on the best white paint for a projection wall (Sherwin-Williams Pro-Classic Extra White Enamel):


Once the living room was painted, the bedroom needed some attention:


Ollie helped . . . sort of. Before he stepped in the paint and pranced around the bedroom:

This is Maggie's awesome cat, Ollie. Another thing that Maggs and I have in common is that we  both take lots of pictures of our cats. Also, Bebe the cat did the same damn prancing around with paint on her feet deal. Oh cats.

The mini-blinds were next to go. Unfortunately, I have an awkward (beautiful, but awkward) window situation in the bedroom and plaster walls that make drilling holes for curtains next to impossible. I do, however, have picture molding throughout the bedroom. I designed a system of curtain rods that could be suspended from regular molding hooks and asked my super-hero blacksmith Dad to make them for me (home-field advantage << sports reference). Here is the hanging system:


And here is the finished product. Bye bye mini-blinds!

!

My next project will be converting this fantastic vintage surveyor's tripod into a floor lamp. Did you know that wiring lamps is the easiest thing in the world?


What type of medium did you use?
By any means necessary . . . 

What did you enjoy about making this project?
I like the thinking and planning and doing. Ollie likes the relaxing when it's done:


What did you think about while you were making it?
I think I love home projects so much because rearranging and organizing and making things is a time when I can just relax and stop thinking a little bit. I think about what I want to do all the time, but once I'm doing it, my mind shuts up for a while. 

Were you doing anything else while you worked on this project? If so, what? (For example, sometimes I watch tv while crocheting.)
I'm always listening to music and singing. Some projects have theme songs and some have whole albums. I have no shame in admitting that the living room was painting to approximately eleven complete runs of the Guilty album. I think I refinished the bookcase to Melissa Manchester's practically perfect Home To Myself. Sometimes, there's dancing involved.*
*usually

Were you pleased with the finished product? What pleased and/or displeased you about it?
I'm always pleased and displeased. I tend to get a bit impatient when I'm working on home projects and that is pretty much always a horrible combination. There are always things I could have done better if I had waited longer or taken a step back, but who has the time? Yeah, I know. I do. Mistakes have been made: 

I should talk to Maggie about how I painted my kitchen bright yellow so that it looked like a giant Easter egg in combination with the light blue cabinets. Sometimes colors go very, very wrong.

More to the point: it's a house, it's never going to be pristine or perfect and sometimes we just have to make concessions. For instance, Ollie and I like to fight over the fabrics we both love and neither one of us is going to budge on this issue:


I am, however, always really happy about finishing a project and having a new excuse to invite people over. Even though my home is always a work-in-progress, I feel like I have accomplished something good every time my friends gather and have a fun, cozy time in my home. Here is a recent example (pre-paint):


Will you make it again?
I'm never satisfied and I have a hard time sitting still. I'll be moving things one inch to the left for the rest of my life.

Can I post a picture of the final product? Please???
Duh-town. Here are some pictures of the two homes I've been in for more than a year (since I was 13). The first set of pictures is from my apartment in Los Angeles, where I lived for three very happy years. The second batch of pictures is from my current apartment in Portland, where I have been for about six months and hope to stay for a long, long time.


Lastly, what is your favorite color and glue?
Right now, my favorite color is mustard yellow and I'm pretty sure everyone's favorite glue is Mod Podge, right?

Tuesday, March 19, 2013

Hot Ticket Tuesdays Presents Adrienne Breslin and the Lovely Rustic Charm of Love


This week's Hot Ticket post features my good friend, Adrienne, who has been busily working on decorations for her wedding in June. Adrienne and I have been friends since middle school, which was about a million years ago. I've always been struck by how different we are: Adrienne is kind of like the Yin to my Yang. She's outgoing, and I'm fairly introverted. The main thing I think we both have in common is silliness. When we get together, we are extremely silly; it's like we're back in high school at play practice.

I've lost touch with a lot of close friends over the  years, but Adrienne and I have always managed to stay in touch. I love that. We got together this weekend, and spent a day crafting like only brides-to-be and former brides can craft. (Someday I will write a post about the horrors of paper flower creation for my wedding.) Adrienne talks about her inspiration for her wedding decorations below. Enjoy!

Tell me about a craft and/or art project you made.
Several things: Burlap picture frames with writing on glass; Our musical “this is where our song begins” sign; Our escort cards; And our rustic crafty mason jars for candles!

What inspired you to make it?
I wanted to find a way to add my own crafty touch to the wedding – our venue is kind of rustic but with a touch of glam. It is all exposed wooden beams, big stone fireplace, but also has these huge copper and crystal chandeliers that give it a glamorous touch. I also wanted to make sure that our interests and personalities came out in our own artistic touches – the wedding has a music theme due to our joint love of music, and I wanted to bring that into our wedding in a classy, but not overbearing way.

Did you come up with the idea yourself, or did you find a pattern and/or template that you used?
A little of column a, a little of column b.

I came up with the picture frame idea on my own. Burlap is the epitome of rustic charm in my mind, and I love the texture it brings, something different than flat paper. I decided to write on the glass, thinking it would add some depth and volume to the look. To be honest, I am rethinking this because I actually find the writing hard to read – I may end up going for a more layered look, using the burlap as a mat instead of a background, bring in an additional layer of matting using my music note paper, and print on cream paper instead.

Adrienne asked our friend, Jojo, to write little poems that tell people where to go for
programs, seats, etc.  She used a chalk pen to write on the glass. I coveted the chalk
pen, but did not tell her. Hint hint.

I got the idea for the sign from Etsy, but wasn’t in the mood to pay money for a wooden lettered sign. The original sign said, “This is where our story begins.” I saw the sign about a year ago and fell in love with the saying and the whimsy of the hand lettering. As our musical theme came about, I started toying with the idea of getting the sign made with the words “This is where our song begins” instead.

The sign was a labor of love that I worked on for several hours this weekend.
Adrienne worked in my wedding flower sweat shop, so I figured that I owed
her big time. 

Mason jars were a total Pinterest find. You can’t log in without finding them. The hardest part of this project for me was actually finding mason jars to begin with!

Escort cards were my idea – we used craft paper envelope thingys for our invitations, and I love that rustic look again, so ran with it.

What type of medium did you use?
The picture frames were $3.99 from Christmas Tree Shop, and I bought sheets of burlap (found in the section where they keep all the pretty paper) from Michaels. I googled the best marker for writing on glass and ended up buying mine from Amazon for about $5. I found this nifty spreadsheet that helped me decide which pen to go with.

For our sign, I spent a lot of time trying to figure out how to stencil on wood and how to make wood look aged and pretty. It turned out that I found a $5 clearance canvas painting at Christmas Tree Shop, which I ended up mod podging our music note paper onto (bought the paper at Michaels – I think it was like 59 cents a page…and I bought 1 million pages). Then together with the craft mistress of SoulGlue notoriety, we stenciled the saying with our names and date of wedding.

My vote goes for the burlap, lace, ribbon ensemble, but I think
they're great overall and will look fabulous with candles inside.
For the mason jars I used….mason jars. Then I am using a bunch of different things to pretty them up – I bought a yard of lace at Joann Fabrics for $5. I also got a mini roll of burlap from Michaels, some pretty ribbons (some was used with my invitations that bring my color sage green into the mix, the other is just a papery white).  I am doing a mix of mod podging lace to them, and also hot gluing the ribbon and burlap to them as well. I think my favorites are the mix of burlap and ribbon, and the one with burlap and lace as well.

Please note necessary crafting supplies of coffee and glue
stick in background.
Escort cards are probably the easiest and most annoying of all of this stuff. They are just craft paper and the music note paper from Michaels, and I am cutting them into the right size – craft paper big enough to fold in half, and then gluing a smaller rectangle of the music paper  to it. For the actual info part (name, table, etc), I am using a textured sticker from Staples that actually has a nice crafty feel to it. I like that they are oval, because it will allow more of the music paper to come through on the edges.

What did you enjoy about making this project? 
I love that I am adding my own time and effort to the wedding decor – the place itself is gorgeous, and I also have a florist making centerpieces and accent floral pieces. But I'm excited that I get to include my own glue, sweat, and tears to our big day.

What did you think about while you were making it?
June 2nd, when I can look back on and enjoy all this planning and crafting.

Were you doing anything else while you worked on this project? If so, what? (For example, sometimes I watch tv while crocheting.) 
Most of the time I listen to music or bug my dog for her thoughts on life.

Were you pleased with the finished product? What pleased and/or displeased you about it? 
Most of the stuff I love…again, the only thing I am not sure about is the frames – I am going to try one “the other way” and decide from there!

Will you make it again?
I can see me using the mason jars around the house for a variety of things! I’d love to plant some herbs in them and keep them on the sill in my kitchen.

Lastly, what is your favorite color and glue?
Favorite color is sage green – my favorite glue is superStik permanent glue stick!

Tuesday, March 20, 2012

Earring Trees for Lovely Earrings

I LOVE earrings. Truly. They are by far my favorite accessory. Until about four years ago, I used a butterfly earring tree that had been passed down to me from my sisters. At some point, I realized that the poor butterfly had become laden with too many earrings. Resourceful and somewhat impulsive, I found an old picture frame and purchased a piece of wire mesh that one would use in a screen door. I whipped the two together and had a new home for my earrings. Sadly, this creation has not survived the test of time.


Above, a profile view of said busted earring tree with cat toy and flip flip in background.

To the left, a front view of said busted earring tree with earrings placed much too close for comfort.

So, what to do? Make a new earring tree! I've been thinking about using a shadow box frame instead of a tabletop frame, as it would provide more structure and less wobbliness. I went out to Joanne Fabrics, picked up a new frame, on sale no less, and got crafting. Official steps are below.


Shadow Box Earring Tree

Materials:
Shadow box frame, any size (This really depends upon how large you want your earring tree to be. I chose a frame that is 10"x10".)
Wire mesh (I purchased a roll of this stuff at Lowes for about $7 and now I will be making earring trees for everyone ever--which is okay because I like to do it. If you don't want to do that, go to a smaller hardware store where you can usually buy smaller pieces.)
Hot glue
Paper for the background of the box
Scissors (Try to use a pair you don't care about too much. Cutting the mesh will dull the scissors somewhat.)
Mod Podge
Foam brush
Sharpie

Directions:

1. Take apart the shadow box and set all pieces aside except cardboard insert included with box.

2. Measure the piece of paper or picture that you chose for the background of the box against the cardboard insert. Trim off edges.
3. Glue the piece of paper to the cardboard with the Mod Podge and the foam brush. Set all aside.
4. Unroll a decent-sized piece of wire mesh. Lay the piece of glass from the shadow box on top of the mesh.
5. Trace around the piece of glass with a sharpie. Lay something underneath the mesh as you trace! Do NOT make the mistake I did in the above picture and then scramble to scrub sharpie from the floor.
6. Remove piece of glass and cut along traced lines.
7. Place piece of mesh against the inside front of the shadow box frame. Apply hot glue to all edges of the mesh.
My earrings are still a bit crowded. Good thing I have excess wire mesh to make another tree!
8. Put the frame back together again without the glass. Hang your earrings in the frame. Yay! Look what you made!

Monday, March 12, 2012

A Home for Paper Flowers

As I mentioned late last month, I've been working on cleaning the office in our apartment. In order to make room in a closet for a stack of records, I had to relocate a box of unfinished paper flowers. These flowers have quite a history. Basically, I went crazy about the decorations for my wedding. Erik and I were married at the Fuller Craft Museum. Subsequently, I decided that I wanted the decorations for our wedding to have a crafty feel. I researched every different kind of paper flower I could find on the internet, in books, by word of mouth--anything. I found directions for origami flowers and began making about a million of them to put together in bouquets for table centerpieces. A few months into this endeavor, I realized that I probably would not have enough time, even with the extraordinary help of my friends, to make ten bouquets. I settled on another paper flower idea, which still took quite some time, but made more sense for the centerpieces. I ended up making an origami flower bouquet for the table where Erik and I sat at the wedding.
Wreath for guest centerpiece
Snazz centerpiece for me & Erik
Months later, I still have about a million origami petals and flowers to use up. They were living in above said box in said closet. This weekend, I decided that I would make a new container for these petals that I could look at on a daily basis in my living room. I've wanted to make a basket from magazine pages since I saw a picture of one in The Big Ass Book of Crafts. If you're interested in looking at specific directions for how to make this basket, and for general crafty joy, I highly recommend you pick up a copy of The Big Ass Book of Crafts. Below is a description of how I made my basket.

To begin, I cut magazine pages from two Martha Stewart Living magazines into thirds. You can use any magazine you want. I just happened to have these on hand. The pages are nice and wide, too, so you get more strips from them.
Next, I grabbed a bamboo skewer from our utensil drawer. I picked up a paper strip and, starting at a corner, rolled the paper around the skewer until I made a straw shape.
I used Sobo Craft Glue to glue the last corner around the straw.

I then flattened the straw. Smoosh!

After flattening the straw, I wrapped it tightly around a pencil.

Holding the now curled straw, I slid it off the pencil and allowed it to loosen a bit. I then hot glued the end of the straw to the newly made ring.

I made probably about 600 of these rings. I watched a lot of Grey's Anatomy while doing this. You can watch whatever show you like while making these. It should not be something that requires you actually pay attention, though.

I chose a decent sized trashcan as a form to place the rings around. I hot glued the rings together starting at the base of the trashcan.

I went around and around the trashcan gluing the rings together. More Grey's Anatomy was watched.

For the bottom of the basket, I hot glued many, many more flat straws in a spiral until it was the correct size. I removed the trashcan from the center of the rings and glued the rings to the spiral. I painted Mod Podge on the inside of the basket to help hold it together.

Here is a rather shadowy picture of the finished basket!

Here is a more colorful picture of the inside of the basket.

So far, it has held together pretty well. I haven't picked it up and swung it around, and I try to carry it by the base. It fits all of the flower petals, and it is quite pleasing to the eye. I'm already thinking of the next one I'll make!

Tuesday, March 6, 2012

Mail Needs a Resting Place, Too

A mail graveyard on our living room floor has been gathering dust and claiming the lives of other pieces of mail for the past couple of weeks. I've been wanting to make something to organize our mail overflow issues, and I attempted the project last weekend. I wanted to use materials I already had on hand in order to save some scratch and use up some fabric remnants. I took a bunch of pictures of the project to show how the project evolved from start to finish. Enjoy!

Ack! It's a horrible mail graveyard!
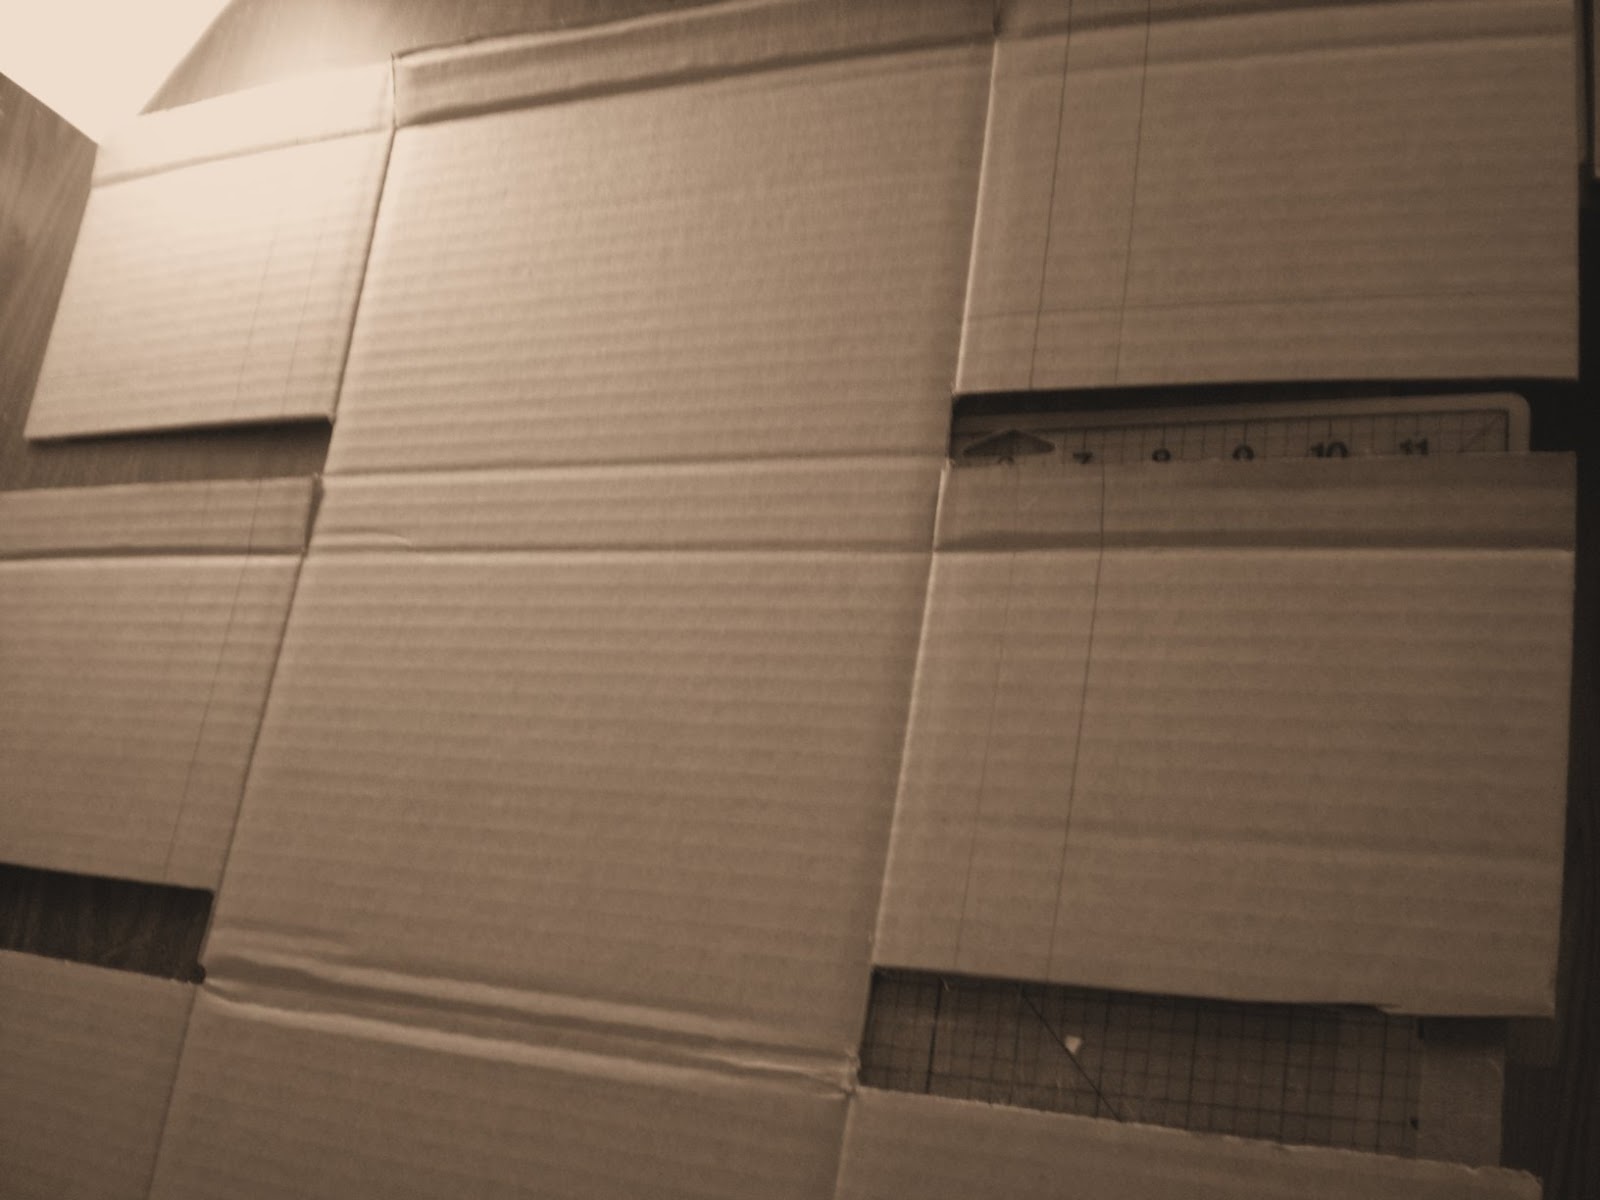
To begin, I flattened a box and cut it in half.
I used the structure of the cardboard to guide the design of the organizer.
At first, I tried to cut the cardboard with scissors. I ended up switching to a razor blade, which offered me much more control and precision when making cuts.
I kept my measurements very simple, using the width of the ruler to measure where I needed to fold and/or cut.
This is a view of the early organizer from the bottom up.
And now we're looking top down...
To put the mail slots together, I decided to go with masking tape. I basically folded the pieces together and then used the tape to bind them.
Mail slots one and two!
I decided to change up the top of the organizer and create a place for magazines.
That top space is all ready for magazines!
I then ironed fabric scraps I've had laying around and cut them to fit the areas I wanted them to cover.
I used my go-to glue Mod Podge to adhere the fabric to the cardboard. I wasn't quite sure how well the Mod Podge would work with the fabric and cardboard, but it ended up being a good choice. The fabric bonded smoothly to the cardboard with no issues.
I used two different types of fabric to break things up a bit.

At the back top of the organizer, I attached, using hot glue, a fabric hanger. I then glued a piece of newsprint to the back of the organizer to help smooth it out.
To finish things up, I printed out labels on my computer, laminated them, and used fabric glue to adhere them to the organizer. And voila! We now have homes for magazines, Erik's mail, and my mail.

Creative Commons License
This work is licensed under a Creative Commons Attribution-NonCommercial-NoDerivs 3.0 United States License.